Mastering the Fretboard Part 1
The first part of the exercise to mastering the guitar is to name all the natural diatonic notes on each string. These are the notes that aren’t sharp or flat.
C D E F G A B
On the guitar, a full tone is 2 frets. Most natural notes are a full tone apart except for EF and BC. These notes are only a semi-tone apart. That means they are only 1 fret apart.
Now that we know our semi-tone pairs (EF and BC) we can start to figure out the rest of the notes on each string.
On the guitar standard tuning is :

Part 1 – Natural notes on each string
6th string – E
5th string – A
4th string – D
3rd string – G
2nd string – B
1st string – E

Start this exercise on the 6th string naming each natural note starting on the open E. E is a semi-tone pair that will make F on the first fret. G is next which is a full tone (2 frets up) etc…
Make sure to name each note out loud and once you reach the 12th fret, go back down to name each note.
Take your time and make sure to repeat this exercise on each string.
Part 2 – Name each note chromatically.
The next part of this exercise we want to name every note. Natural notes and accidentals. The accidentals are notes the notes in between the natural notes we just practiced.
For this exercise when we are going up the fret board we are going to name the coloured tones (accidentals) as Sharp. When we are going backwards we will name them as flat.

If you notice C# and Db are the same note. We change the name based on the key that we’re playing in… just for future reference, however, for this exercise it only matters depending on the direction we’re naming the notes in
Just like the first part we are going to do this on every string. Take your time and name each note out loud.
Part 3 – Circle of 4ths.
We are going to repeat the Method we did in part 1 and part 2 but this time we are going to move through the Circle of 4ths. The circle of 4ths is a pattern we use in music that will allow us to move through all 12 music notes. This will also let us develop our ear hearing a 4th interval and break up the linear practice we did in the previous parts.
C F Bb Eb Ab Db Gb B E A D G
Find each note of the circle of 4ths on each string and make sure to name the note out load as you go… you get the idea
Part 4 – 2-minute drill
Now that we have gone through all of this we are ready for our final challenge. The 2-minute drill. The goal is simple, Find all the notes on each string… in 2 minutes. To do this we are going to use the circle of 4ths again. Start on the low E string (6th) and Find C. Then find C on the 5th string, then the 3rd string, the 2nd string, and finally on the 1st. Now find F on the 1st string, 2nd, 3rd etc… repeat this process for all the notes in the circle of 4ths in 2 minutes.
Now, realistically it might take you 20 minutes at first… That’s fine, each time will get faster and faster. Once you can do it in under 2 minutes you will have an amazing concept of the neck and root pictures, CAGED method, and anything that will make a lot more sense.
Visit my Youtube channel and see the full exercises I use to master the fretboard.
https://www.youtube.com/watch?v=oIEZrumPiDg
Mastering the Fretboard Part 2
Now that we have completed the 2-minute drill and feel comfortable with the fretboard notes we’re ready to learn about the root pictures
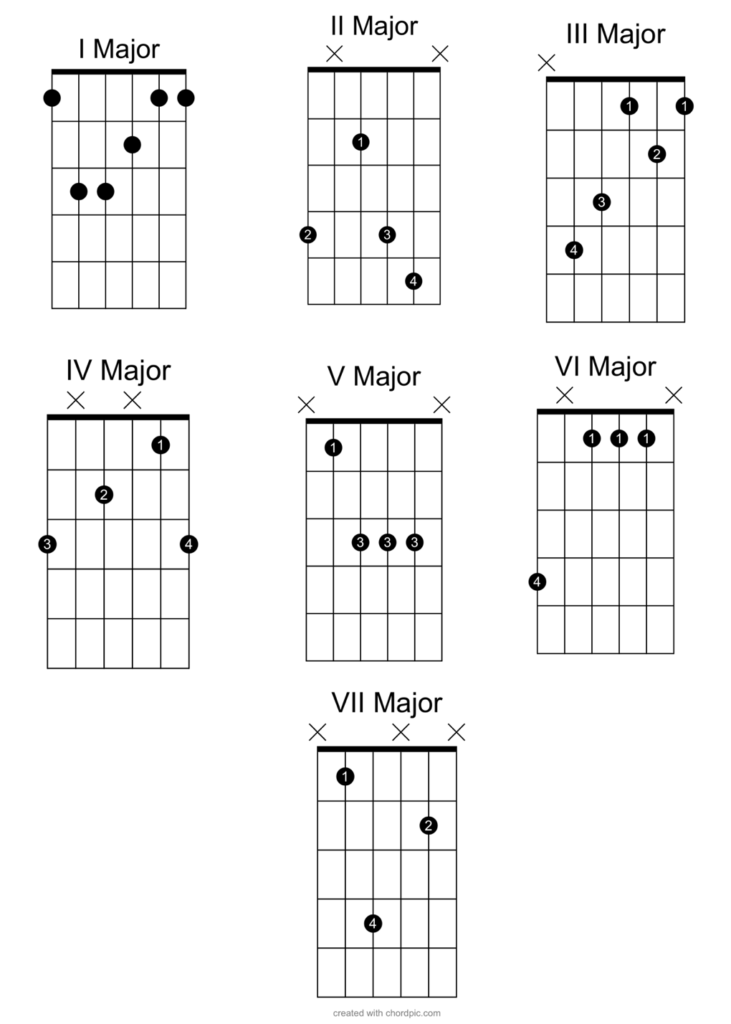
What are root pictures? They are shapes based on octave notes in a position. They create shapes we can use to quickly reference the fretboard of the guitar. Each root picture has a chord shape and scale based on what you want to play. Major, Minor, Blues etc…
Traditionally this method is done with 5 shapes, however, the method I teach is a 7 form method. This makes sense when doing modes and other fun music stuff.
Root Pictures and Major Chords


